A subdomain is a subsection of your website that can exist as a new website without a new domain name. Use subdomains to create memorable URLs for different content areas of your site.
For example, you can create a subdomain for your blog that is accessible through blog.example.com and www.example.com/blog
In this tutorial, we’ll show you how to setup a subdomain.
1. Login to your Binarilink Cloud Console
2. Access cPanel
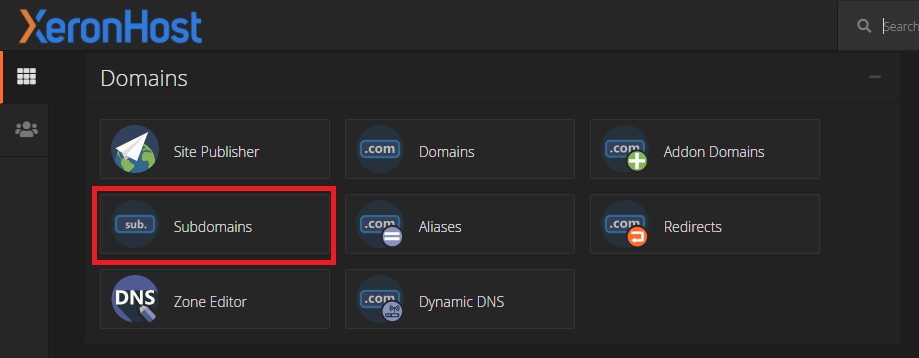
3. Once in cPanel, scroll down under Domains and click Subdomains.
4. On the Subdomains page, simply give the subdomain a name, select the domain (if you have multiple domain or addon domain), and define the Document Root folder.
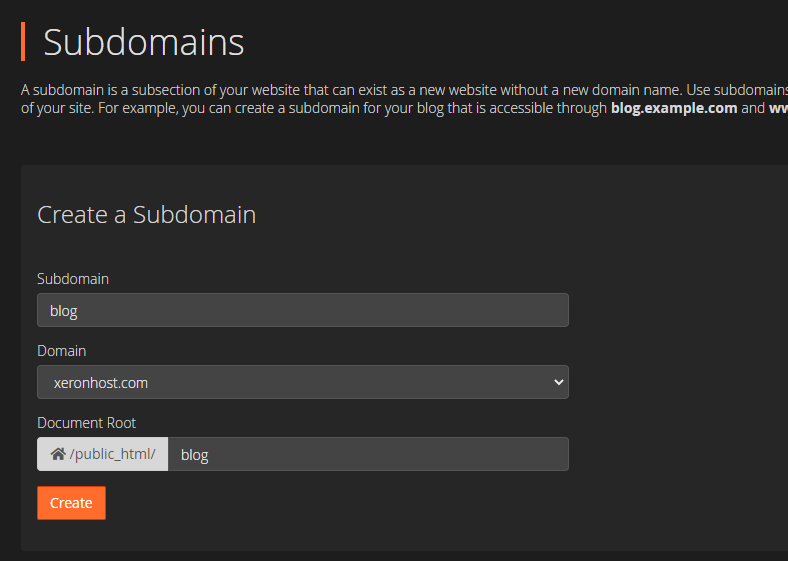
For this example, we’re going to call our subdomain blog, so, we will select the Domain xeronhost.com and leave the Document Root folder the default public_html/blog. After this is done, click Create.
5. The subdomain is now set up and can be viewed at blog.xeronhost.com.
Additionally, a directory with the subdomain folder has been created where you put the Document Root folder. Ours is in public_html.


